Recognizing the Unlabeled: A Common Workshop Dilemma
When you open your drill bit box and realize the labels have faded—or the entire case is missing—it can feel like stepping into someone else’s shop. Bits scattered like puzzle pieces, and you have no idea which one fits where. I’ve been there. Years ago, working on a cabin up in Nagano, I dropped an open case of bits into a stream while crossing a log. All I had left were a bunch of anonymous bits in the bottom of a canvas pouch. No labels, no backup.
That day taught me to read bits the same way a farmer reads clouds. You don’t need fancy guides—just your eyes, your fingers, and a little practice. Let’s walk through the most common types of drill bits and how to spot them with confidence.
Twist Bits for Wood – the Backbone of Everyday Drilling
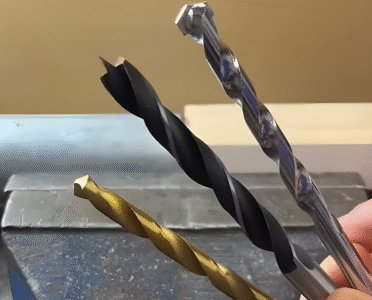
The most used and most misunderstood drill bit is the humble twist bit for wood. Despite their common appearance, they have subtle traits that give them away.
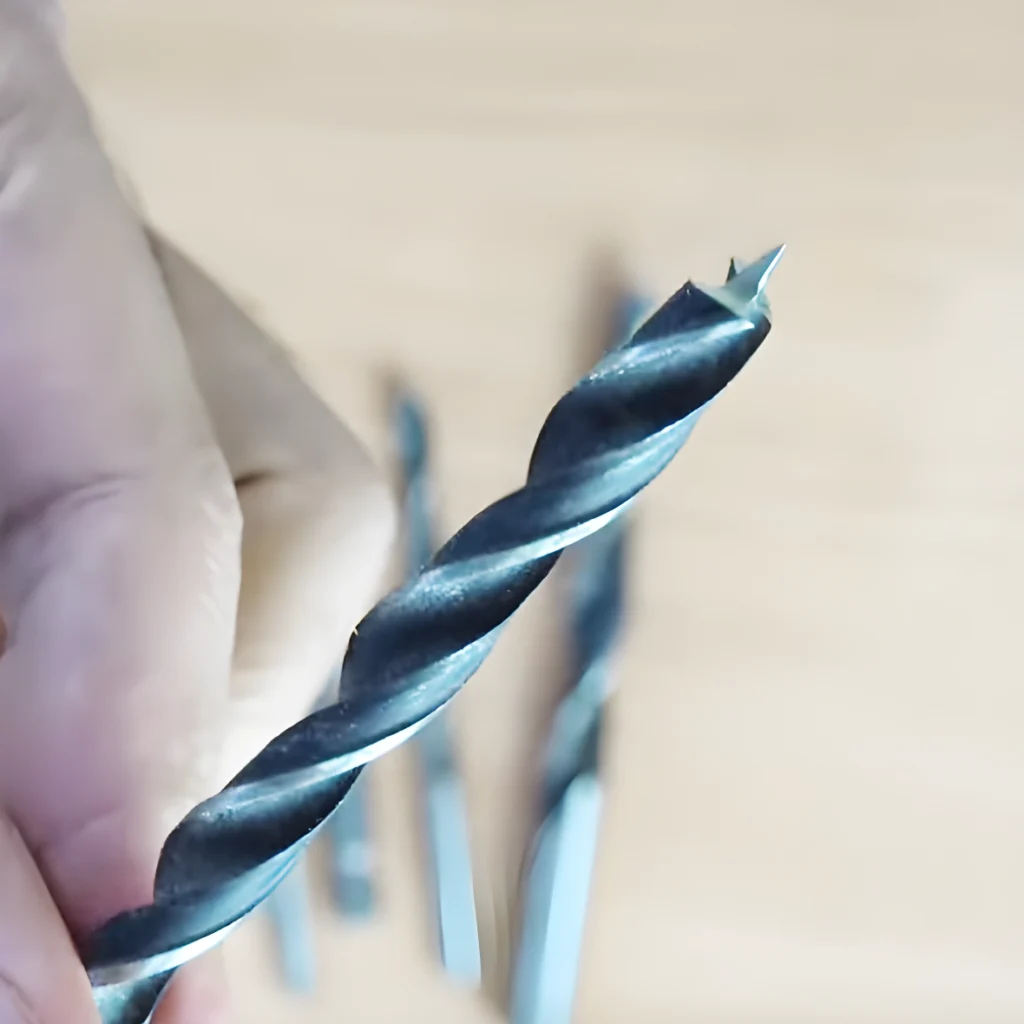
The classic wood bit has a sharp brad point at the tip—almost like a mini spear. That tip helps the bit stay put exactly where you want to drill. Unlike metal bits, which are often blunt at the nose, wood bits have that needle-like starter. Look also for wide spirals—these help remove the softer wood shavings quickly, preventing burn-out or jamming.
Once in Hokkaido, I was helping restore an old farmhouse. The only available power drill belonged to a neighbor, and the bit in it looked like it had seen better decades. I figured it was for metal, but the pointed tip said otherwise. I tested it on a fir plank—it dove in like a fish through water. That bit, despite the rust, was a classic wood twist. Function trumps looks.
These bits are used across every woodworking trade in the world. If you’re hanging a shelf, building a chicken coop, or repairing the leg on a kitchen chair—this is your go-to.
Universal Twist Bits – The Jack of All Trades
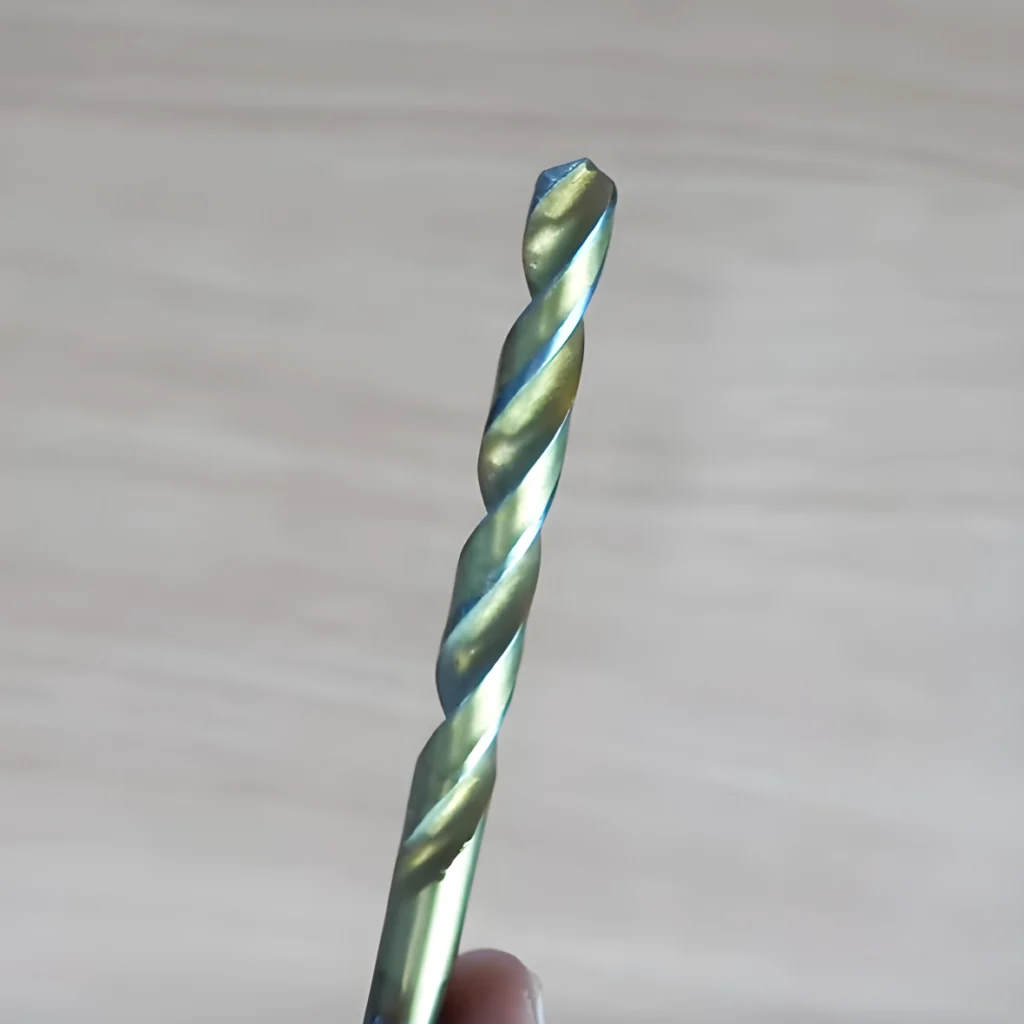
Universal bits are easy to spot once you’ve seen a few. They’re usually coated with titanium nitride—a golden tint that gives them durability and flash. Their tips are slightly tapered but not pointy like wood bits. They have a constant twist and shaft width, which makes them feel uniform from end to end.
These are great for metal, plastic, and wood—if the wood is soft enough. I often carry a few in my tool belt because they can get me through odd jobs when I’m in the field and don’t want to carry five types of bits.
During a job converting an old camper into a mobile sauna, I had to drill through aluminum siding and plastic panels. One universal bit saved me hours. I didn’t even bother switching to specialty bits. Sometimes, less is more.
Watch out for overheating—universal bits can burn out fast if pushed too hard into hard materials like steel or thick hardwood.
Masonry Bits – For the Tough Stuff
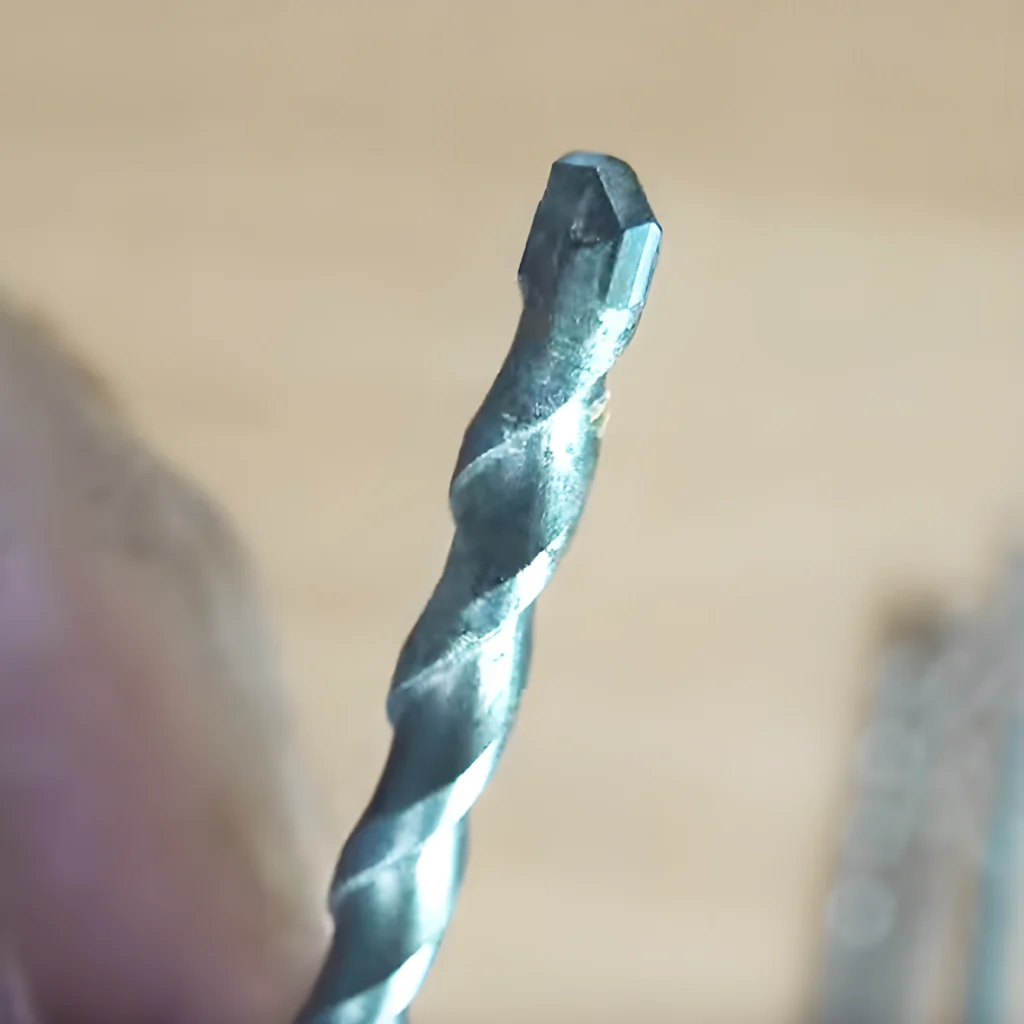
These bits are easy to recognize by their chisel-shaped carbide tip. They usually have a flatter edge, and if you look closely, you’ll see a ridge or bump where the head protrudes slightly wider than the shaft.
They’re often used with hammer drills for driving into concrete, stone, or brick. If you live in a concrete apartment like I did during my early Tokyo days, this bit becomes your best friend.
A friend once asked me to hang a curtain rod on a wall she swore was drywall. I used a standard twist bit and barely scratched the surface. Switched to a masonry bit, turned on hammer mode, and got through like a spoon through crème brûlée.
Pro tip: If your drill doesn’t have hammer mode, these bits won’t do much good. Masonry work requires both the bit and the tool to work in sync.
Why Fewer Bits Might Be Better
With all the options out there—glass bits, auger bits, step bits, countersinks—it’s easy to go overboard. But for 90% of what I do, three types are enough: wood twist, universal twist, and masonry.
It’s not that I don’t admire the engineering behind specialty bits. I do. But most homeowners and small workshop folks can make do just fine with these basics. Save your money and shelf space.
I used to haul around a massive bit set. It looked impressive, but I only ever touched five of them. Eventually, I built a compact roll-up pouch with just the essentials. It weighs nothing, and I’m never stuck guessing.
Think of it like a chef’s knife. Sure, there are dozens of specialty knives, but a chef can do almost everything with just one or two sharp blades.
The Bit Myth: More Teeth Doesn’t Mean More Power
There’s a misconception out there that “more flutes = better bit.” Not always. Some bits have multiple cutting edges, but unless you’re drilling into something specific—like tile or hardened steel—those extra flutes can slow you down by clogging more easily.
One customer I worked with insisted on using a six-flute bit to drill into pine. The thing smoked like a chimney and scorched the wood. I handed him a regular two-flute twist bit, and the hole was clean and fast.
Match the bit to the job. It’s not a contest of who has the fanciest gear.
When In Doubt, Test It
If you’re still unsure what a bit is made for—test it. Take a scrap of wood, a metal bracket, or a chunk of concrete and give it a spin. How the bit behaves will tell you more than any label ever could.
Feel the resistance. Watch the debris. Smell the material. A burning smell might mean you’re using a metal bit on hardwood or pushing too fast.
Years ago, I labeled each unknown bit with masking tape and ran a test board. Now, even when the labels are gone, I remember them by feel.
The more you drill, the more fluent you become in this language of spiral and steel.
Less Gear, More Knowledge
Drill bits aren’t just tools. They’re extensions of your hands. And like any tool, understanding them takes time—not just reading specs. I’d rather see someone with three well-used, well-understood bits than a fancy kit collecting dust.
So next time you reach for a bit without a label, don’t panic. Look closely. Trust your fingers. And remember: the tool doesn’t have to be fancy—it just has to work.