The Quiet Work Before the First Plank
When people talk about flooring, they often jump right to the pretty part — wood tones, finishes, grain patterns. That’s the show. But anyone who’s spent a day on their knees in an empty room with a chalk line and a tape measure knows where the real work is: before that first piece ever clicks into place.
For me, laying flooring has always been a kind of quiet chess game. You’re reading a room, not just measuring it. You’re thinking five rows ahead, checking the light, squinting at the trim, running your fingers along the subfloor for stories it might be hiding. And you’re asking the same question over and over:
Where do I begin, so that it all ends well?
Years ago, I was laying oak laminate in a Japanese guesthouse built during the Showa era. The structure had shifted over the decades — charming, but not square. By the time I reached the final wall in the living room, I realized I’d be left with a 3 cm strip unless I pulled the entire layout back by a full board width. It was a good reminder: if you don’t respect the starting point, the ending will humble you.
Subfloors: Where the Truth Lives
You can’t talk about floors without talking about what’s underneath. A solid floor starts with a solid subfloor — but “solid” doesn’t always mean what you think. In Japan, I’ve seen everything from beam-and-joist assemblies with 600mm spacing to newer builds using full plywood or particleboard panels. Each calls for a different mindset.

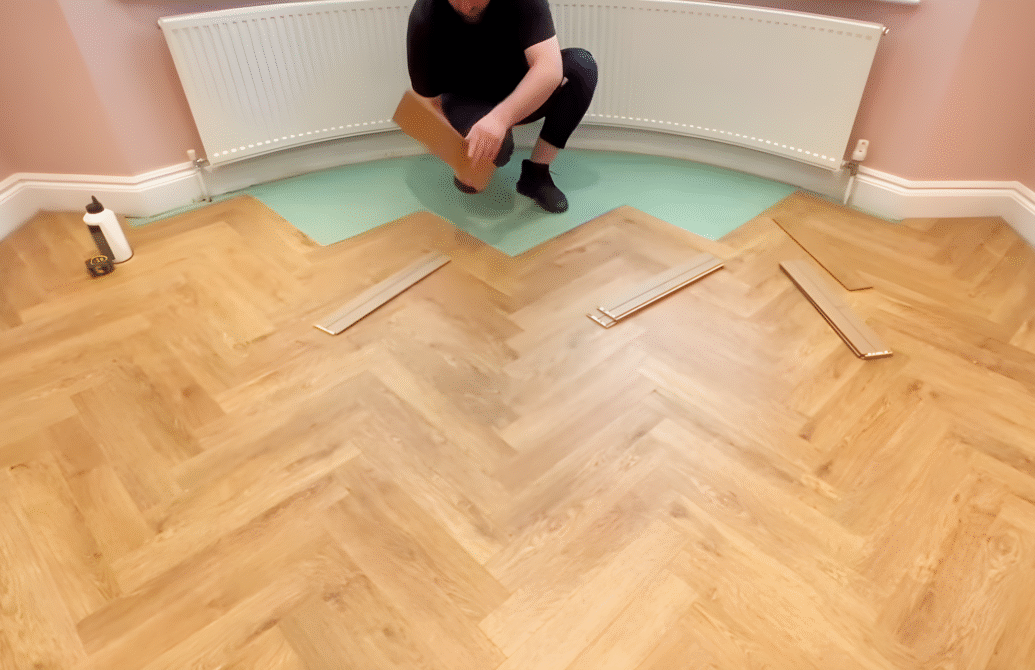
Direct flooring (DF), common in remodels, often gets laid on foam underlayment with either tape or glue. People love DF because it’s gentle on the feet and helps with acoustics — especially important in wood-frame homes where noise travels fast. But I’ve had jobs where clients mixed tape and glue on the same floor, and let me tell you: that’s asking for trouble.
When you mix adhesive systems, the floor starts playing tug-of-war with itself. The floating sections try to rise as glue cures, while the taped areas resist. It becomes a creaky, clicky mess that’ll haunt you every time someone walks across the seam.
The rule I live by: use one method, stick to it, and let the floor settle the way it wants to settle.
On Tape, Glue, and Trusting the Surface
Here’s something I learned the hard way — not all surfaces are worthy of tape. If you’re working on polished concrete or plastic insulation panels, tape might stick fine. But with rough plywood or uneven screed? Don’t risk it. The tape won’t hold, and your floor will start drifting like a barge without anchor.
In those cases, I go with a urethane-based glue. Yes, it expands. Yes, you need to give it time. But it holds like a handshake from an old friend.
Still, no matter how good your glue is, it can’t compensate for a careless layout.
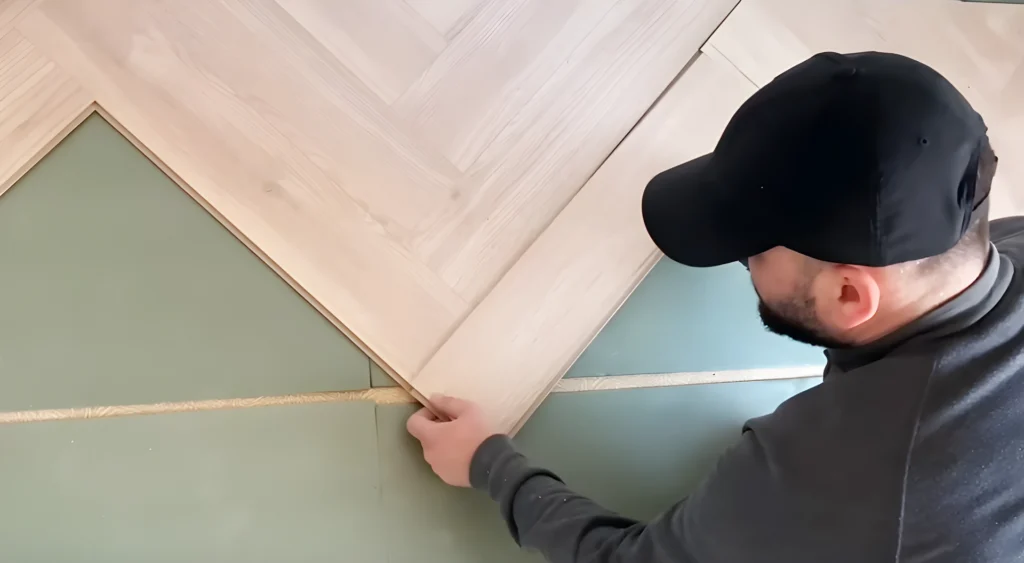
Flooring Layout: The Invisible Geometry
Here’s the part they skip in most how-to guides: layout isn’t about lines. It’s about logic. Every room has what I call a “visual axis” — the direction the eye naturally follows when entering. If your joints jog even slightly off that line, people may not know why it feels off, but they’ll feel it.
When I’m doing a multi-room install — say, a hallway into a kitchen, then turning into a living space — I spend hours just sketching. I take the width of the boards, subtract the tongue, factor in the gaps, and run test rows on paper. That little act of drawing helps me see the entire job in a way numbers alone never can.
You’re not laying wood. You’re laying rhythm. And rhythm is sensitive to distortion.
I remember doing an install where two rooms met at a crooked hallway. Rather than fight the angles, I shifted the pattern so that the misalignment occurred behind a kitchen island. That one tweak saved the job from looking off — and the client never noticed. Which is the whole point.
End Boards: Don’t Let Them Haunt You
A rookie mistake? Ending a room with a skinny sliver of flooring that looks like it was sliced off with a razor blade. I’ve done that. We all have. The fix is simple, but it takes discipline.
Start by dry-laying a full row across the width of the room. Measure the leftover space at the far wall. If it’s less than half a board, cut your starting board to make the ends balance. It feels weird at first, trimming your first piece before you’ve even started. But your future self — and your knees — will thank you.
I once did a project in Hokkaido during winter. The temperature swings in that cabin meant everything was expanding and contracting like crazy. The client wanted end boards to align perfectly with the sliding door tracks. We cut custom lengths for both start and end boards and ran a full-length spline between them. That floor’s still holding 8 years later.
The Center Line Method: For Big Rooms and Brave Souls
Sometimes, especially in large open-plan areas, you have to start from the center. It’s scary — there’s no wall to square off of. But it’s the only way to avoid ending up diagonally skewed 10 meters later.
Here’s what I do:
- Snap a centerline along the longest axis of the room.
- Dry-fit rows outwards in both directions.
- Use spacers to simulate wall gaps.
- Check alignment by sighting along the joints from low angles.
Then I make micro-adjustments. A few millimeters here, a few there. It’s not OCD. It’s geometry you can feel in your knees.
Tricks That Don’t Come in the Box
A few things I’ve picked up over the years, none of which are in the manuals:
- If you’re using tongue-and-groove planks, run a beeswax candle lightly along the grooves. It helps with the click, and smells good too.
- Cut all end pieces slightly long and tap them in. Let the wall take the compression. Floors are better tight than gappy.
- Never trust factory square cuts. Always check angles with a speed square. I’ve had 92-degree boards straight out of the box.
And my personal favorite: lay a yoga mat near your workspace. Kneeling all day ruins backs and spirits. Your joints deserve better.
When Things Go Wrong, You’re Learning
Once, in Nagano, I had a whole section lift after a week. Turned out the subfloor had been wet from a pipe leak. I had to pull everything up, sand down the mold, re-dry, and start again. Brutal. But the client said the new install “felt better” — like the boards had learned something too.
Floors do that. They change as they’re lived on. They shift, sigh, and settle. That’s part of their charm.
A good floor doesn’t just lie flat — it holds the story of how it got there.
Lines That Lead Home
Laying flooring isn’t just carpentry. It’s choreography. Each joint, each line, each cut carries weight — not just literal, but visual, emotional, spatial. A room with well-laid flooring feels right even when empty. That’s how you know it’s been done with care.
If you’re just starting out, take it slow. Don’t rush the chalk line. Don’t skip the dry run. And always — always — trust your eye more than your level. Tools help, but it’s your body that knows when something is off.
When I look back at floors I laid 10 years ago, I don’t remember the brand of glue or the model of saw. I remember where I knelt, the sound of rain on the roof, the moment the last plank slid into place.
That’s what makes it worth doing.